 Save to Pinterest
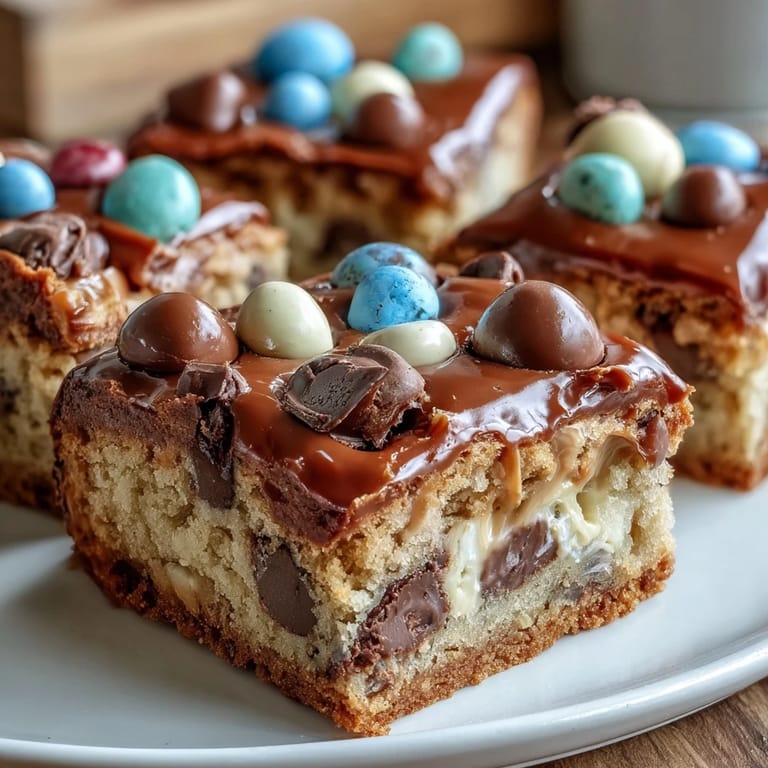
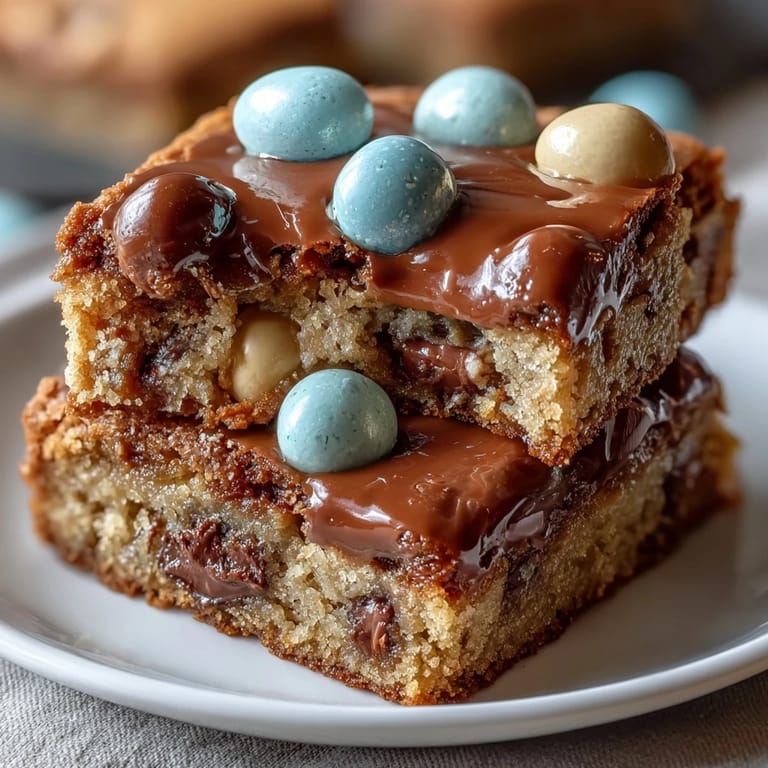
 The scent of melted butter and peanut butter mingling in my kitchen isn&t something I expected to become so familiar with, especially on an early spring afternoon when the sunlight pools onto the countertop. My first time making Peanut Butter Easter Egg Cookie Bars was almost accidental—prompted by a surplus of Easter egg chocolates and a craving for something easy but festive. There&s a special thrill in pressing candies into the dough, seeing their bright colors pop against the golden batter. Every batch delivers that moment when you lift out the bars and the candies glimmer like hidden treasures. The anticipation while they cool is its own kind of celebration.
I remember making these for a neighborhood egg hunt, wrangling kids and adults alike into the kitchen for a taste test. The kids were drawn in by the candy colors, and the grown-ups lingered for seconds, debating whether peanut butter or chocolate reigned supreme. Even after the last bar vanished, friends joked about hiding extras for later—a sure sign of approval. The laughter and crumbs left behind are still proof of just how quickly these bars unite a group. If you ever need an icebreaker, these cookie bars are up for the job.
Ingredients
- Unsalted butter: Melting it just a bit before mixing ensures every bite stays soft and rich—skip salted butter for better flavor control.
- Creamy peanut butter: Opt for classic creamy, as natural peanut butters can change the texture; warming up just helps it blend more easily.
- Light brown sugar: This brings moisture and caramel notes that meld beautifully with peanut butter.
- Granulated sugar: Adds structure and sweetness, balancing the brown sugar depth.
- Eggs: Room temperature eggs help create a smooth batter and even rise.
- Vanilla extract: A splash of vanilla rounds out the flavors, making the bars taste bakery-fresh.
- All-purpose flour: Sift or whisk beforehand to avoid lumps, ensuring perfect chewiness.
- Baking powder: Gives just enough lift to keep the bars from being too dense.
- Baking soda: Balances rise and helps golden edges form.
- Salt: A little salt sharpens all those sweet flavors; don&t skip it.
- Easter egg chocolate candies: The centerpiece—press a few extra on top for more sparkle and crunch.
- Semi-sweet chocolate chips (optional): Use if you adore a deeper chocolate hit; skip for a purist peanut butter experience.
Tired of Takeout? 🥡
Get 10 meals you can make faster than delivery arrives. Seriously.
One email. No spam. Unsubscribe anytime.
Instructions
- Prep Your Pan:
- Line your baking pan with parchment, letting it curl up the sides; it makes lifting the bars out a breeze and cleanup a snap.
- Blend the Bases:
- Whisk melted butter with peanut butter, brown sugar, and granulated sugar—watch as the sugars dissolve into a glossy swirl that smells like pure happiness.
- Mix In Eggs & Vanilla:
- Crack in eggs, add vanilla, and whisk; the mixture should look creamy and smooth, like sunlit batter ready for its next stage.
- Combine Dry Ingredients:
- In a separate bowl, whisk flour, baking powder, baking soda, and salt—this step prevents surprises later on and keeps the bars tender.
- Fold It Together:
- Gently mix dry into wet with a spatula, stopping when everything&s just incorporated—avoid over-mixing for a softer finish.
- Add the Candy Magic:
- Toss in the Easter egg candies and chocolate chips, stirring them through so every bar gets a fair share; save a handful for the top.
- Spread and Decorate:
- Smooth the dough into your pan, press extra candies on top, and admire the pops of color.
- Bake:
- Slide the pan into the oven and bake until the edges look golden and the center is set—if you press lightly, it should stay soft but spring back.
- Cool and Cut:
- Once cooled, use the parchment to lift the slab out. Slice into bars and serve—watch them disappear.
 Save to Pinterest
 The first time these bars left my kitchen for a spring party, I watched two toddlers delightedly swap colored candies atop their slices. Suddenly, the treats weren&t just dessert—they were part of laughter and conversation, fueling tiny negotiations and big smiles. It&s funny how a simple baked good can become a centerpiece for connection. Those little exchanges made the recipe feel like a tradition was starting. It& all the sweeter because it happened by accident.
Making the Bars Extra Special
Sometimes, I drizzle melted peanut butter over the cooled bars for an extra layer of flavor and shine—it takes hardly a minute but looks spectacular. A handful of pastel sprinkles adds a playful touch, especially for birthdays or casual gatherings. If you love crunch, swap half the chocolate candies for roasted peanuts. Changing toppings turns the bars into a choose-your-own adventure. Just keep the base recipe and mix-ins flexible and you&l never get bored.
Swapping Out Ingredients
If Easter candies aren&t handy, small chocolate buttons or even peanut butter chips work well as replacements. I discovered mini marshmallows add a chewy surprise. For a richer taste, try dark chocolate chips, though the bars will be slightly fudgier. Seasonally, red and green candies make these perfect for winter holidays. Experimenting with new mix-ins is half the fun, so don&t hesitate to get creative.
Serving, Storing & Troubleshooting
Once cooled, store bars in an airtight container—they keep their soft texture for several days and are ideal for packing into lunchboxes. If bars seem too dry, a short stint wrapped in plastic in the microwave softens them right up; careful not to overdo it or the candies may melt. These bars freeze surprisingly well, just layer with parchment and defrost before serving.
- Don&t cut when warm—let them set fully.
- If candies sink, make sure your batter isn&t too loose.
- A sprinkle of flaky salt just before serving adds extra impact.
 Save to Pinterest
 Whether you&re baking for a spring gathering or simply chasing a sweet craving, these bars bring cheerful flavor and bright energy to your kitchen. Sharing them always feels like sending out a little bit of celebration.
Recipe FAQs
- → Can I use natural peanut butter for these bars?
Natural peanut butter can be used, but ensure it's thoroughly mixed to prevent oily or dry bars. Creamy, processed varieties yield the best texture.
- → How do I know when the bars are done baking?
The bars are ready when the edges turn golden and the center appears set yet soft. Avoid overbaking for optimal chewiness.
- → What candy alternatives work for other seasons?
Swap Easter egg candies for regular chocolate candies, colored sprinkles, or chocolate chips for year-round enjoyment.
- → How should I store the bars?
Keep bars in an airtight container at room temperature for up to four days to maintain freshness and softness.
- → Can I freeze these bars for later?
Yes, slice and wrap bars tightly, then freeze. Thaw at room temperature for a quick treat whenever you wish.
- → Are there allergen concerns with the candies?
Check candy labels for allergens like dairy, soy, or gluten, especially when using different brands or mix-ins.