 Save to Pinterest
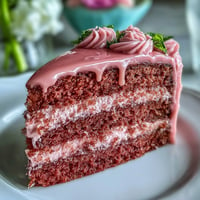
 My sister called me three weeks before her graduation with a slightly panicked tone—she wanted something special for the celebration dinner, something that felt fancy but wouldn't keep me tied to the kitchen all day. I'd been experimenting with mini cheesecakes in cupcake liners, and when she mentioned the party would have about two dozen guests, I knew I'd found the answer. The idea of topping them with little diploma picks came to me while I was grocery shopping, and I couldn't help but smile imagining her face when she saw them.
I'll never forget pulling these out of the oven while my sister was getting ready upstairs, and the smell that filled the whole house—rich, vanilla-sweet, with that hint of toasted graham cracker. She came down five minutes later asking what I was making, and when she saw the little bites lined up on the cooling rack, she got teary-eyed. That's when I knew these weren't just desserts; they were tiny edible congratulations.
Ingredients
- Graham cracker crumbs (1 cup): This is your crust foundation, and the fresher the crackers, the better they taste—I learned to make my own by crushing them in a food processor rather than buying pre-made, since they stay crunchier.
- Granulated sugar (2 tbsp for crust, 1/2 cup for filling): Keep your sugars separate and measure carefully; too much sweetness in the crust can make it cakey instead of crispy.
- Unsalted butter (4 tbsp, melted): The melted butter binds everything together and creates that rich, buttery flavor that makes people close their eyes when they eat it.
- Cream cheese (12 oz, softened): This is non-negotiable—it must be at room temperature or you'll end up with lumps no matter how much you beat it, and lumpy cheesecake filling is disappointing.
- Egg (1 large): Just one egg keeps these bites tender without making them heavy, and it acts as the binding agent that holds everything together.
- Vanilla extract (1 tsp): Don't skip this or use imitation; real vanilla extract adds a subtle depth that makes people ask what your secret ingredient is.
- Sour cream (2 tbsp): This adds tanginess and helps keep the centers creamy instead of dense, which is the difference between a good cheesecake and one you can't stop eating.
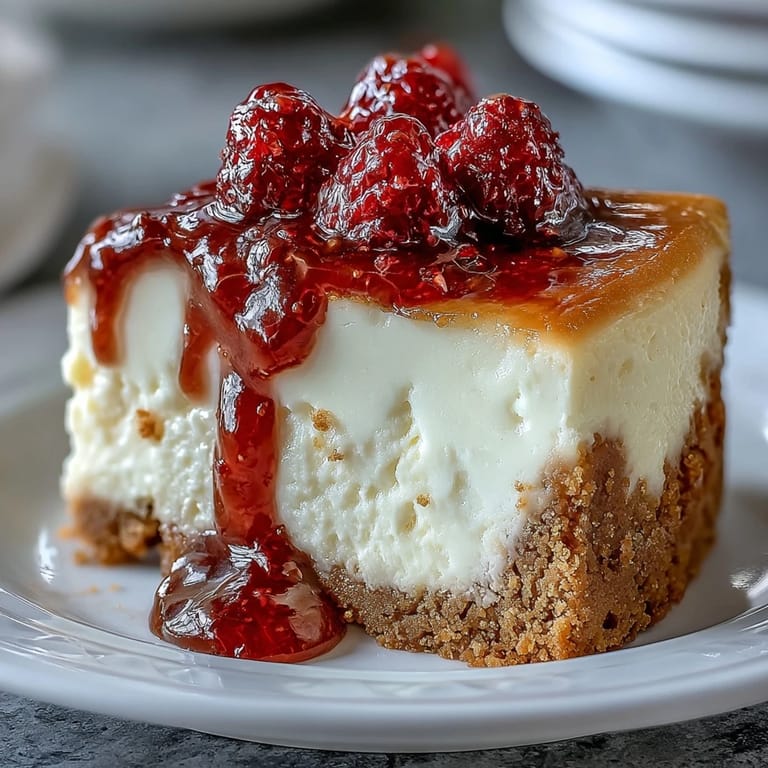
- Fresh mixed berries (1/2 cup, diced): Choose berries that are ripe but not mushy, and pat them dry before topping so they don't weep liquid onto your cheesecakes.
- Fruit preserves (2 tbsp, optional): A light brush of warmed preserves gives the berries a jeweled shine and adds a little extra flavor dimension.
Tired of Takeout? 🥡
Get 10 meals you can make faster than delivery arrives. Seriously.
One email. No spam. Unsubscribe anytime.
Instructions
- Prep your pan and preheat:
- Get your oven heating to 325°F and line those 24 mini muffin cups with liners—this temperature is gentler than standard baking and prevents the edges from cooking too fast while the centers stay soft. The liners make cleanup easy and help the bites maintain their shape.
- Make the crust mixture:
- Combine your graham cracker crumbs, sugar, and melted butter in a bowl and stir until it looks like wet sand—every bit of crumb should be coated with butter. This is your moment to make sure everything is evenly distributed, or you'll end up with some dry spots in certain bites.
- Fill and press the crusts:
- Spoon about a teaspoon of crust mixture into each liner and press it down firmly with the back of a measuring spoon or your finger. Don't be gentle here; you want a solid, compact base that won't shift when you add the filling on top.
- Blind bake the crusts:
- Bake these for just 5 minutes to set them slightly and deepen the flavor, then pull them out and let them cool while you move on to the filling. This step prevents soggy crusts and is honestly the secret that changed everything for me.
- Prepare the cheesecake filling:
- Beat your softened cream cheese and sugar together until it's completely smooth and creamy—this usually takes about 2 minutes with an electric mixer. Take your time here because lumpy filling is your only real enemy in this recipe.
- Mix in the wet ingredients:
- Add the egg, vanilla, and sour cream and blend until just combined—don't overmix or you'll incorporate too much air and end up with cracks on top. This should take maybe 30 seconds once you turn the mixer on.
- Fill each cup:
- Spoon about a tablespoon of filling over each crust, smoothing the top gently with the back of the spoon. The filling will rise slightly as it bakes, so don't fill them all the way to the top.
- Bake to creamy perfection:
- Bake for 13 to 15 minutes—you're looking for the centers to be set but still have a tiny bit of jiggle when you gently shake the pan. Slightly underbaked is better than overbaked when it comes to cheesecake because they'll continue to set as they cool.
- Cool gradually:
- Let them sit in the pan for 15 minutes after coming out of the oven, then transfer to a wire rack to cool completely. This gradual temperature change prevents sudden cracking, which is why patience matters here.
- Chill thoroughly:
- Pop them in the refrigerator for at least an hour—this is when they firm up and develop that perfect creamy texture. Overnight chilling is even better if you have the time.
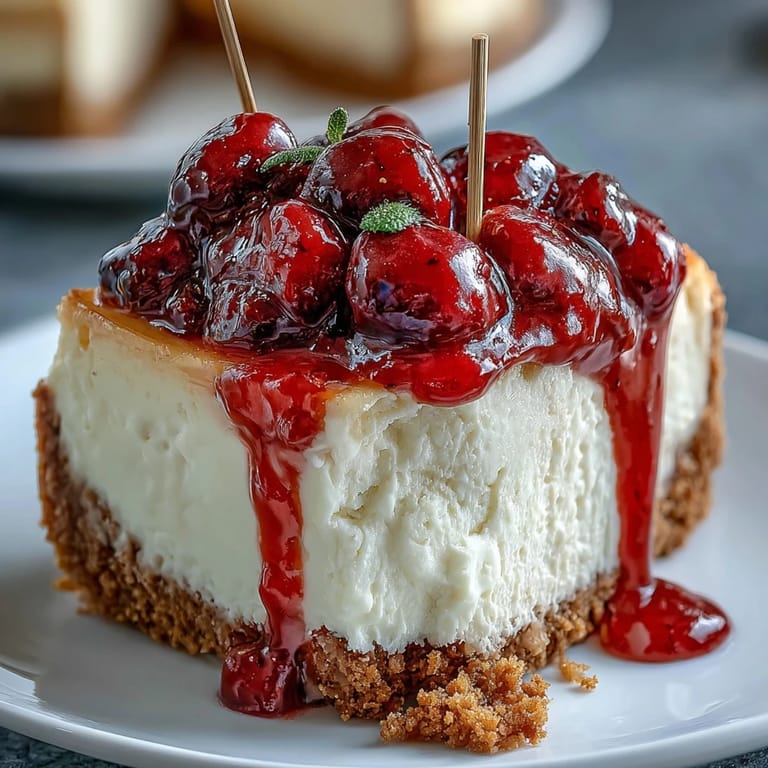
- Add the toppings:
- Top each cheesecake bite with a small handful of fresh berries, and if you want that glossy professional look, warm your fruit preserves for 20 seconds and brush a light coat over the berries. The preserves add shine and a touch of extra fruity flavor without being heavy.
- Add the diploma picks:
- Right before serving, insert a diploma pick into the center of each bite at a jaunty angle. This is when they transform from simply delicious into celebration-worthy, and it's genuinely fun to do.
 Save to Pinterest
 The best moment came when one of my sister's friends took a bite and literally said, "Wait, these are homemade?" followed by a laugh and genuine disbelief. That's when I realized these little bites represent something bigger than just dessert—they're edible proof that you showed up and made something special for someone you care about.
Flavor Variations Worth Trying
Once you've mastered the basic recipe, you can have fun experimenting without making things complicated. I've tested lemon zest mixed into the filling—just add the zest of half a lemon and reduce the vanilla to half a teaspoon—and it creates this bright, refreshing version that feels like spring. For chocolate lovers, a thin drizzle of melted dark chocolate over the berries works beautifully, or you can swirl a tiny bit of chocolate into the filling before baking. Even adding a pinch of cinnamon to the crust mixture transforms the flavor profile into something warmer and more autumnal.
Storage and Make-Ahead Strategy
These cheesecakes actually taste better the next day because the flavors have time to meld together and the texture becomes even creamier. Store them in an airtight container in the refrigerator for up to three days, and they'll stay fresh and delicious. You can even bake them two days ahead and add the berries and diploma picks just before serving, which takes the stress out of last-minute party prep.
Making Them Gluten-Free and Dietary Notes
If you need to make these gluten-free, simply swap regular graham crackers for gluten-free ones in the crust—the ratio and method stay exactly the same, and honestly, most people won't notice the difference. The filling is naturally vegetarian since it's just cream cheese, eggs, sugar, and dairy, making this recipe accessible for a lot of dietary preferences. If anyone at your celebration has dairy allergies, you could experiment with dairy-free cream cheese alternatives, though I haven't personally tested that route and can't speak to how it affects the final texture.
- Always double-check all ingredient labels for hidden gluten or allergens, especially if you're serving people with sensitivities.
- Let guests know upfront what the bites contain so they can make informed choices about what they eat.
- These freeze beautifully for up to two weeks if you want to make them even further in advance, though thaw them in the refrigerator overnight before serving.
 Save to Pinterest
 These little bites have become my go-to celebration dessert because they feel special without requiring you to become a pastry chef. They're the kind of thing that makes people remember that you cared enough to make something by hand.
Recipe FAQs
- → What type of crust is used for the bites?
A buttery graham cracker crumb crust provides a crisp, sweet base for the creamy filling.
- → How long should the bites be chilled?
They should be chilled for at least one hour to allow the filling to set properly.
- → Can the berries be substituted?
Yes, fresh mixed berries like blueberries, raspberries, or strawberries can be used according to preference.
- → What purpose do the diploma picks serve?
The diploma picks add a festive decorative element, perfect for graduation celebrations or themed events.
- → Are there gluten-free options available?
Gluten-free graham crackers can be used to create a gluten-free version of the bites.