 Save to Pinterest
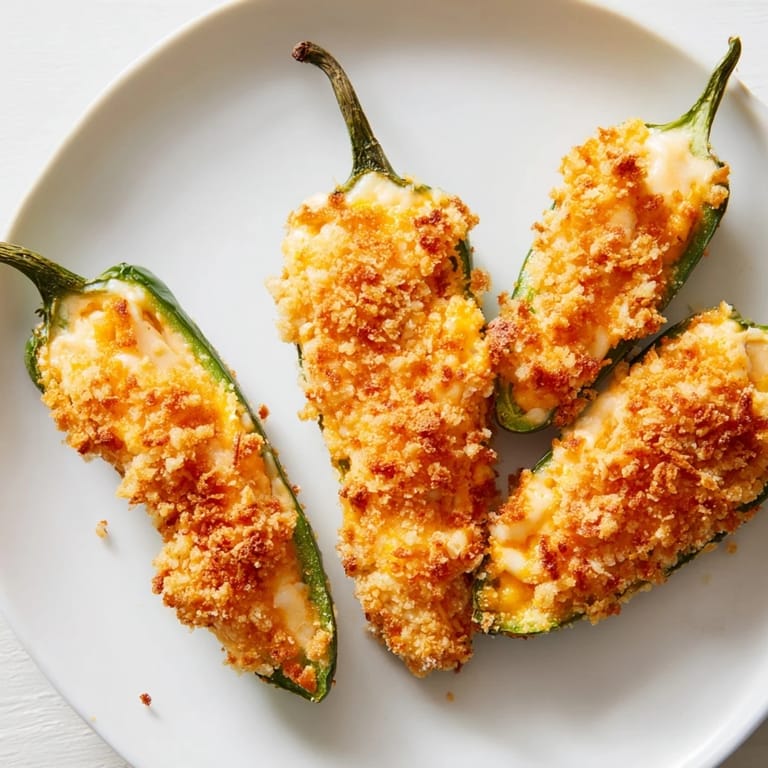
 The first time I made jalapeño poppers, I was trying to impress someone at a potluck and grabbed whatever I had in my fridge—cream cheese, cheddar, and a bag of jalapeños that had been hiding in the back. What started as a half-thought experiment turned into the dish everyone asked about, and honestly, I've been making them ever since. There's something magical about the contrast between the creamy, mild cheese and that sharp heat from the peppers, especially when you bite into that golden, crispy exterior. Now I make them whenever I need to feel like I've got my kitchen life together.
I remember bringing these to a game night where someone had already brought three different dips, and mine were gone first—that quiet moment of pride sitting on my chest as I watched people reach for the last one. It taught me that sometimes the simplest recipes, when made with a little care, hit different than overly complicated ones.
Ingredients
- Fresh jalapeños (8 large): Pick ones that are firm and bright green; the size matters because you want enough room for filling without them being unwieldy.
- Cream cheese (120 g): Softening it first makes the filling smooth and spreadable, saving you frustration at the stuffing stage.
- Shredded cheddar cheese (60 g): This gives the filling actual flavor depth—don't skip it for more cream cheese.
- Garlic clove, minced (1 small, optional): I usually add it because cheese alone can feel one-note, but leave it out if garlic isn't your thing.
- Smoked paprika (1/4 tsp): This tiny amount adds a whisper of smokiness that makes people ask what your secret is.
- Salt (1/4 tsp for filling, plus 1/2 tsp for breading): Season as you go; it's easier to add more than to fix oversalted poppers.
- All-purpose flour (60 g): This helps the egg stick properly and creates better adhesion for the breadcrumbs.
- Eggs (2 large): These are your binder and what makes the breadcrumb coating stick and turn golden.
- Breadcrumbs (120 g panko or regular): Panko stays crunchier longer, but regular breadcrumbs work if that's what you have.
- Black pepper (1/4 tsp): Fresh cracked pepper tastes noticeably better here than pre-ground.
- Vegetable oil for frying: Keep it neutral—you want the peppers and cheese to shine, not taste like the oil.
- Ranch dip (120 ml): This is the cooling agent that makes eating hot peppers actually pleasant.
Tired of Takeout? 🥡
Get 10 meals you can make faster than delivery arrives. Seriously.
One email. No spam. Unsubscribe anytime.
Instructions
- Prep your peppers:
- Slice each jalapeño in half lengthwise, then carefully scoop out the seeds and white membranes using a small spoon or melon baller. This is where most of the heat lives, so removing them keeps things approachable. Wear gloves—trust me, your hands will thank you later.
- Make the filling:
- In a bowl, mix the softened cream cheese, cheddar, minced garlic, smoked paprika, and salt until it's smooth and spreadable. Taste a tiny bit on your finger; the flavors should be balanced, not overly salty.
- Stuff the peppers:
- Using a small spoon, fill each jalapeño half generously with the cheese mixture, pressing gently so it settles in but doesn't spill out the sides. Aim for roughly equal amounts in each one so they cook evenly.
- Set up your breading station:
- Arrange three shallow bowls in a line: one with flour, one with beaten eggs, and one with breadcrumbs mixed with salt and pepper. This assembly-line approach keeps things clean and organized.
- Coat each popper:
- Working with one jalapeño at a time, roll it in flour to coat all sides, then dip it in egg, then press it into the breadcrumbs until completely covered. The pressure helps the breadcrumbs stick so you get that golden crust when frying.
- Heat your oil:
- Pour oil into a deep saucepan and heat to 180°C (350°F)—use a thermometer if you have one, or test with a small piece of bread that should turn golden in about 60 seconds. If the oil isn't hot enough, your poppers will be greasy; too hot and they'll burn outside before the cheese warms through.
- Fry in batches:
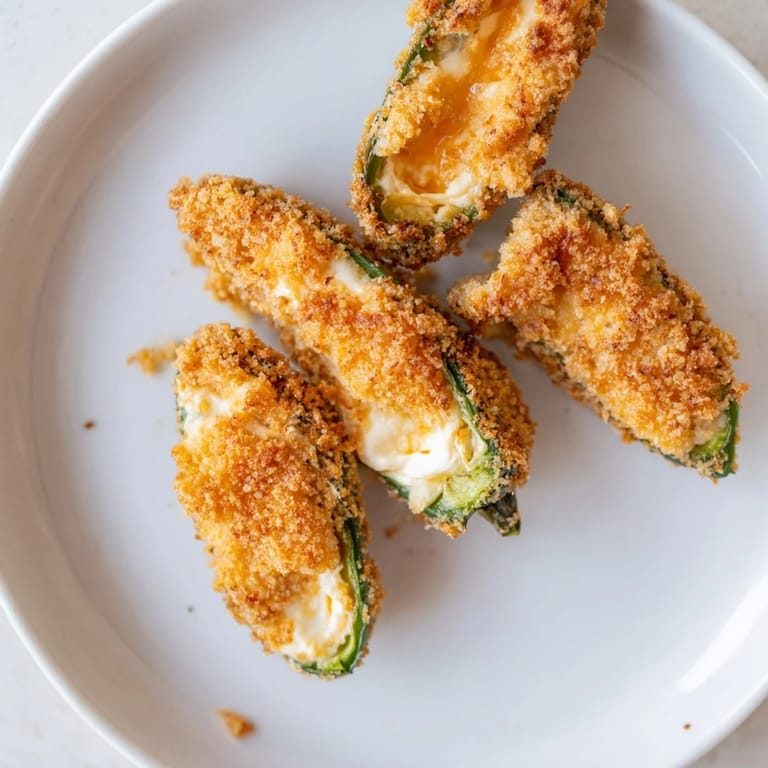
- Gently lower 4–5 poppers into the hot oil and fry for 2–3 minutes per side until they're golden brown and crispy. Don't crowd the pan; they need space to cook evenly and stay crispy on all sides.
- Drain and serve:
- Remove them with a slotted spoon and place on paper towels to drain off excess oil. Serve warm with ranch dip on the side, and watch them disappear.
 Save to Pinterest
 There was this one time my roommate came home while I was frying a batch, and the whole apartment smelled like toasted breadcrumbs and melted cheese. He asked if I was some kind of professional chef, which made me laugh because I was just following a feeling at that point. That's when I realized these aren't fancy—they're just comforting and worth making for the people you like having around.
Variations That Actually Work
Once you nail the basic method, the filling becomes your playground. I've swapped cheddar for pepper jack when I wanted more heat, mixed in some crispy bacon once for someone at a dinner party, and even tried a version with cream cheese and sharp white cheddar that tasted almost gourmet. The key is keeping the ratio roughly the same so the filling stays creamy and holds together. Don't overthink it—if you like it in a cheese context, it probably belongs in a jalapeño popper.
The Baking Alternative
Not every occasion calls for deep frying, and honestly, sometimes the cleanup feels like too much. You can arrange your breaded poppers on a baking sheet and bake them at 220°C (425°F) for 15–18 minutes, turning once halfway through. They won't be quite as dramatically crispy, but they'll still have a pleasant crunch and way less oil, so your hands and kitchen stay cleaner. The texture is more like a baked chicken nugget than a true fried popper, but it's a solid trade-off when you're cooking for a crowd and don't want to babysit a pot of oil.
Making Them Ahead
I've found that you can prepare and bread the poppers up to a day ahead, then refrigerate them on a plate until you're ready to fry. Cold poppers actually fry better because the filling stays contained longer, and the outer coating gets crispier. You can even freeze them for a couple of weeks—just fry directly from frozen, adding another minute or two to the cooking time.
- Double-coat them by repeating the egg and breadcrumb steps for extra crunch that lasts longer.
- Keep your oil clean by using a fine-mesh strainer to remove any crumb debris between batches.
- Let them rest for a minute after frying so the cheese sets slightly before you bite into them.
 Save to Pinterest
 Jalapeño poppers are the kind of recipe that keeps giving back—they're simple enough to make on a Tuesday, impressive enough to bring to a gathering, and forgiving enough that even if something goes slightly off, they'll still taste good. That's the mark of a recipe worth returning to.
Recipe FAQs
- → How do I safely remove jalapeño seeds?
Wear gloves to avoid skin irritation, then slice peppers lengthwise and carefully scrape out seeds and membranes using a spoon or melon baller.
- → Can I bake these instead of frying?
Yes, place breaded poppers on a baking sheet and bake at 220°C (425°F) for 15–18 minutes, turning once for even crispness.
- → What cheeses create the best filling?
A creamy blend of softened cream cheese with shredded cheddar provides a smooth but flavorful filling; pepper jack can add extra heat.
- → How to achieve extra crunch on the coating?
Double-coat by repeating the egg and breadcrumb steps before frying to add a thicker, crunchier crust.
- → What oil is best for frying jalapeños?
Use vegetable oil heated to 180°C (350°F) for deep frying to ensure even, golden crispness without overpowering flavors.