 Save to Pinterest
 There's something about a chili bowl that turns an ordinary Tuesday into something worth savoring. My sister called me one rainy afternoon asking what to make for her roommates who were stopping by, and without thinking, I rattled off this recipe—one I'd been tweaking for years in my own kitchen. What started as a quick suggestion turned into her texting photos of everyone's bowls, topped high with cheese and cilantro, steam rising off the rice underneath. That's when I realized this chili wasn't just food; it was the kind of dish that brings people together without fuss.
I made this for a small dinner party last winter, and the moment everyone took their first spoonful, the kitchen went quiet in that perfect way. Someone asked if I'd spent all day on it, and I got to tell them the truth: forty minutes, mostly just letting things simmer while we caught up. That's the magic of this bowl—it feels like you've fussed, but you really haven't.
Ingredients
- Olive oil: Two tablespoons is your starting point for building flavor—it lets the onions soften without sticking, and that first sizzle sets the tone for everything that follows.
- Onion and garlic: These two are the backbone, and mincing the garlic fine means it dissolves into the broth rather than leaving harsh chunks.
- Bell peppers (red and green): The color matters here, both for looks and for slightly different flavor notes—red peppers add sweetness while green brings a subtle earthiness.
- Ground beef or alternative: A pound is generous enough to feel hearty without overwhelming the beans and vegetables; if using plant-based, crumble it as it cooks so it distributes evenly.
- Tomato paste: Just two tablespoons, but this concentrated layer of tomato flavor is what separates a forgettable chili from one people ask you to make again.
- Canned tomatoes and beans: Drain and rinse your beans thoroughly—this prevents that starchy, cloudy broth that can muddy your chili's flavor.
- Corn: A cup of kernels adds sweetness and texture; frozen corn works just as well as fresh and saves you prep time.
- Spice blend (chili powder, cumin, paprika, oregano): These proportions are balanced so no single spice shouts over the others, but taste as you go and adjust to your preference.
- Salt, pepper, and cayenne: Start with what's listed and taste before adding more heat—some people in your audience might not want the fire.
- Beef or vegetable broth: This creates the simmering liquid that lets all those flavors marry together; vegetable broth works beautifully if you're keeping things plant-based.
- Rice or grains: Whatever you choose as your base should be tender but with a bit of structure—it's the raft that carries your chili.
Tired of Takeout? 🥡
Get 10 meals you can make faster than delivery arrives. Seriously.
One email. No spam. Unsubscribe anytime.
Instructions
- Build your flavor base:
- Heat the olive oil in a large pot over medium heat and add your diced onion. You'll know it's ready when it starts to turn translucent and smells sweet—about two to three minutes. Then add the minced garlic and both bell peppers, stirring occasionally for another three to four minutes until the peppers begin to soften and the garlic perfumes the whole kitchen.
- Brown the meat:
- Increase the heat slightly and add your ground beef, breaking it apart with a wooden spoon as it cooks. This step takes about five to seven minutes, and you're looking for no pink remaining—the meat should be evenly browned and breaking into small, even pieces.
- Develop depth with tomato paste:
- Stir in the tomato paste and let it cook for about a minute, stirring constantly. This short cooking time removes the raw edge from the paste and lets it blend into the oil and meat, creating a richer base.
- Bring it all together:
- Add your diced tomatoes straight from the can, along with both drained beans, the corn, and all your spices. Stir everything together until the spices are evenly distributed and the mixture looks cohesive rather than layered.
- Let it simmer:
- Pour in your broth, bring the pot to a gentle simmer, then reduce the heat to low. Cover partially and let it cook for twenty-five to thirty minutes, stirring occasionally to prevent sticking on the bottom—the longer it simmers, the more the flavors integrate.
- Prepare your canvas:
- While the chili cooks, prepare your rice or grains according to their package instructions. Having everything ready means you can serve while the chili is still steaming.
- Assemble and serve:
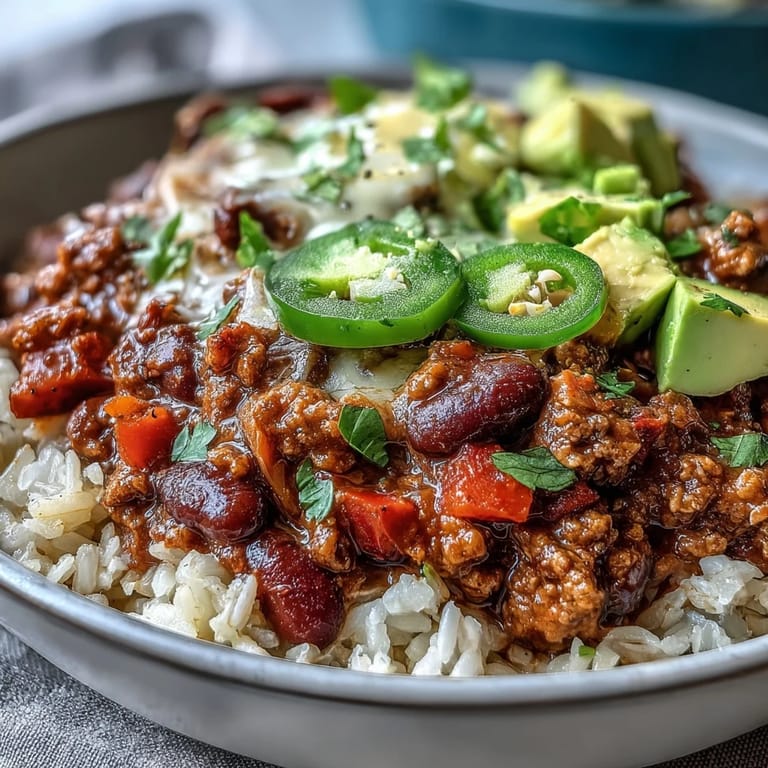
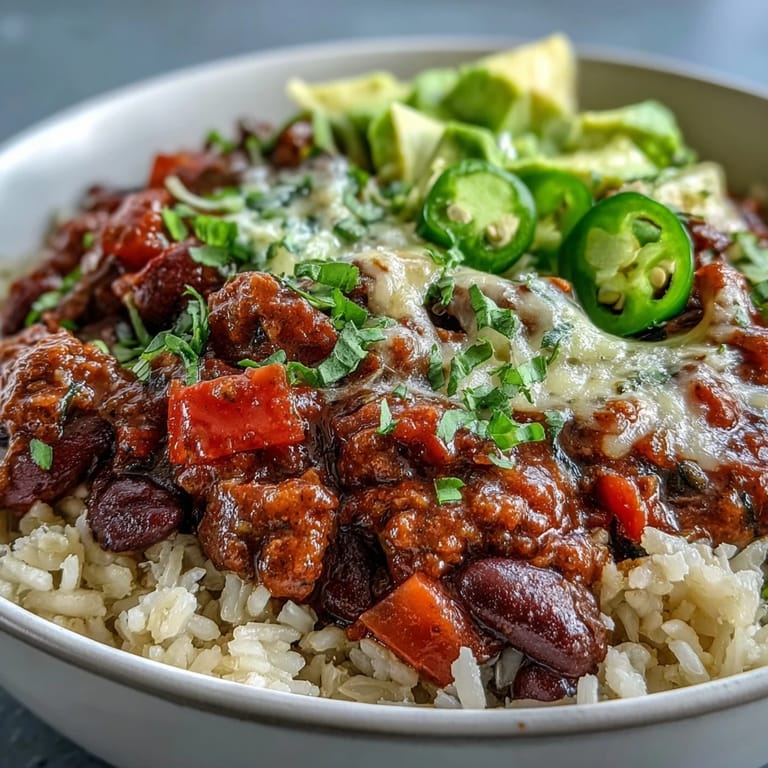
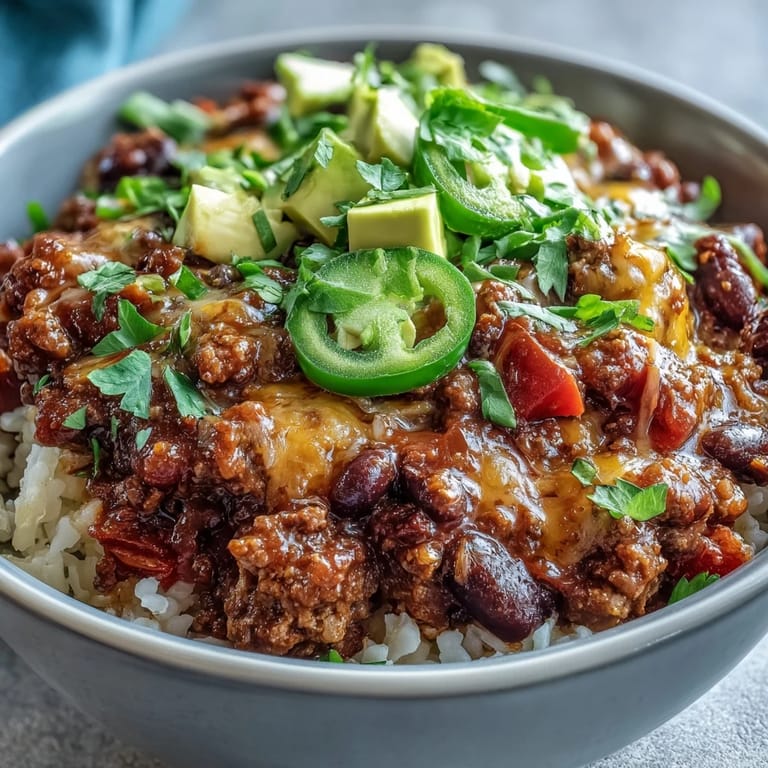
- Spoon a generous portion of warm rice or grains into each bowl, then ladle the chili over the top. Set out your toppings so everyone can customize their own.
 Save to Pinterest
 My neighbor brought her daughter over one evening, and the girl asked if she could help add the toppings. Watching her carefully sprinkle cilantro and place avocado slices on her own bowl made me understand why this dish matters—it's not just about hunger, it's about giving people permission to make something their own.
Customizing Your Bowl
The real beauty of this chili bowl is how it adapts to whoever's eating it. I've served it with quinoa for guests eating grain-conscious, with white rice for those who want comfort, and with no grain at all for someone doing low-carb—and every version felt complete. The spice level shifts too; I've made batches where I skip the cayenne entirely for a coworker who doesn't eat heat, and others where I've added more chili powder and smoked paprika for friends who love fire.
The Topping Strategy
Toppings aren't afterthoughts here—they're part of the eating experience. Cheese adds creaminess, cilantro and green onions bring freshness, avocado provides richness, and lime juice brightens everything with acid. The first time I set out all the options, I realized people have strong preferences, and giving them choice meant everyone felt seen at the table.
Make-Ahead and Storage
This chili tastes better the next day, after the spices have had time to settle into the background and create something more complex. I often make a double batch on Sunday and reheat portions throughout the week, and each time I taste it, it's slightly deeper and more interesting than before. Store it in an airtight container in the refrigerator for up to four days, or freeze it for up to three months—just thaw it in the fridge overnight before reheating gently on the stove with a splash of broth if needed.
- Freeze the chili before adding rice so you can pair it with whatever grain appeals to you when you reheat.
- Keep toppings separate and add them fresh just before serving, so cheese doesn't get weird and avocado stays bright.
- If you're meal prepping, store the chili and grain components in separate containers so nothing gets soggy.
 Save to Pinterest
 This bowl has become my answer to almost every question—what to bring to a gathering, what to make when someone's having a hard day, what to cook when you want to feed people without drama. It's honest food that tastes like you care.
Recipe FAQs
- → What makes this chili bowl base different from traditional chili?
This version is specifically designed as a bowl base, meant to be served over rice or grains rather than enjoyed as standalone soup. The inclusion of corn and two bean varieties adds texture and sweetness that pairs beautifully with the underlying grain base.
- → Can I make this vegetarian?
Absolutely. Substitute the ground beef with plant-based crumbles or simply add an extra can of beans. The vegetable broth works perfectly for liquid, and you'll still get plenty of protein from the bean combination.
- → How spicy is this chili?
The base has mild to medium heat from chili powder and optional cayenne. You can easily adjust by increasing or decreasing the cayenne and chili powder. Serve with extra jalapeños for those who prefer more heat.
- → What grains work best as a base?
White and brown rice are classic choices, but quinoa, farro, bulgur, and barley all work wonderfully. Each grain brings slightly different texture and nutritional benefits to complement the hearty chili.
- → How long does this keep in the refrigerator?
The chili portion stores well for 4-5 days in an airtight container. Actually, the flavors often improve after a day or two. Store the grain separately and reheat both gently when ready to serve.
- → Can I freeze this dish?
Yes, the chili freezes beautifully for up to 3 months. Freeze without the grain and toppings. Thaw overnight in the refrigerator and reheat gently on the stovetetop, adding a splash of broth if needed.